MS SQL: Linked Server Connection Issue
20 June 2022
Reading time: 6 minutes

Creating a new Linked Server in MSSQL seems to be one of the easiest DBA’s tasks. It might however happen that some problems occur. How to deal with a failed connection test? Let me describe the issue I faced and how I solved it.
What is a Linked Server?
Linked Servers are used to enable one SQL Server Database Engine to read data from another remote datasource and execute T-SQL statements on remote database objects. The remote data source does not have to necessarily be only another SQL Server instance, the provider might be i.a. Oracle database or Azure CosmosDB. The purpose of creating a Linked Server is to enable quick and seamless data integration between various data sources
Required Permissions
Let’s imagine that our internal client asks us to join a short 15-minute meeting and expects us to create a Linked Server during that call. We are informed that it’s a very typical implementation, which has already been introduced on another internal environment and we will be provided will all necessary information. The only reason we are needed on that call is that because we obey the security rules and do not grant sysadmin rights to anyone outside our DBA team, which helps us keep an eye on all significant events on our DB environment.
Linked Server successfully created but connection test failed
So coming back to our case study, the stakeholder provided us with the query which was used on another instance and they claim that it should work with no issues. Our job was just to click “Execute” on the supposedly-perfect query from our admin account and to report success. Well, the Linked Server has beed created, but the simple test connection failed. Why? Let’s discover.
Please note that for this article’s purpose I’ll show the GUI troubleshooting path, not the T-SQL query.
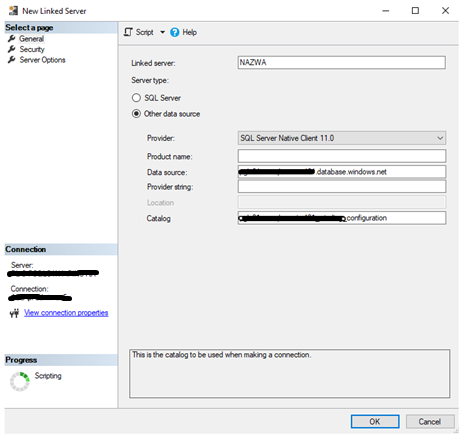
So we’ve been provided with the Linked Server name, data source Provider, source server address (Data source) and the database name (Catalog).
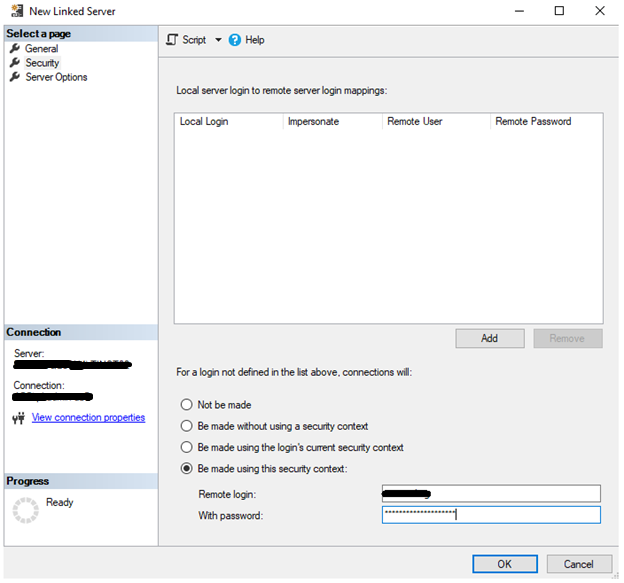
In the Security tab we’re to choose the fourth option – the connection will be made using this security option – all we have to do is just to enter the username and password we’ve received from the client.
And that’s it. We know the source server address, the source database name and we have a user’s credentials which has proper access scope. We’re clicking OK. What could go wrong?
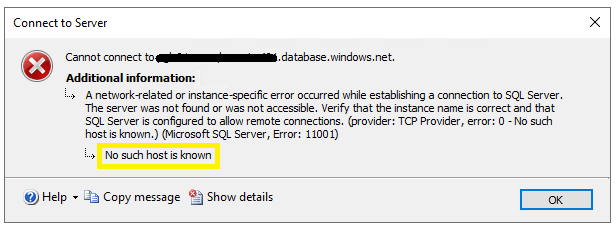
Yikes! The error dialog appears:
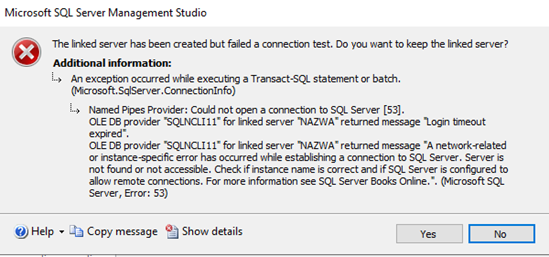
Unfortunately, something went wrong. Let’s cautiously read what the error message says, it might be help us chose what to do next:
- Could not open a connection to SQL Server,
- Login timeout expired,
- A network-related or instance-specific error has occured while establishing a connection to SQL Server. Serves is not found or not accessible – It’s a very common Error 53, suggesting that the server address is either incorrect or it does not allow remote connections.
Solve your problem with these steps
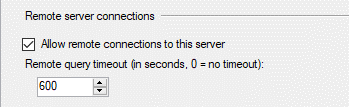
I’ll provide the troubleshooting path which I followed and finally found out how to successfully establish connection between my server and the one we’re trying to link to. If my solution does not fit for you, I’d suggest firstly contacting the source server’s DBA and asking him to confirm if they do allow remote connections. This can be verified by opening SQL Server’s instance properties > Connections tab.
Before contacting another DBA, the steps I’ve taken were:
1. Check for typos and pinged the source server
Obvious – but worth checking. Double-check if you’ve properly entered/pasted the server address, database name, user’s credentials. Try pinging the server you’re supposed to connect to. Ping request could not find host <hostname> might be alarming
2. Check the user’s permissions
A simple verification we may do is to try to log in with the provided credentials to the source server.
The error I got is clear: my machine is not able to recognize the host we’re trying to connect to.
Perfect, then we are almost there. No woder why ping request could not find the host if we’re trying to connect to an external domain (we should’ve asked the stakeholder to describe the source server’s parameters more precisely). Anyway, the solution is very simple – we have to edit the hosts file and help our local machine connect to an external source.
3. Add the server IP and DNS in the hosts file
On the server where your SQL Server engine is installed go to the following file: C:\Windows\system32\drivers\etc\hosts.
Before changing any system file – don’t forget to save its copy somewhere else – just in case. Let’s open the hosts file in the Notepad and add in the last row the IP address and DNS name of the desired server.
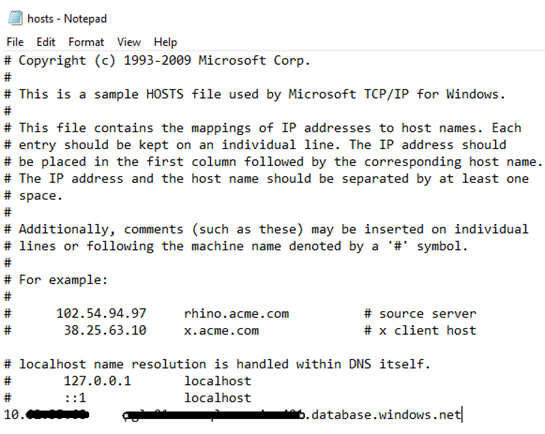
Just to remind – the “#” symbol serves for commenting out the rest of the row. In our case we do not want the hash at the beginning of our entry. After entering the correct value, save the file and go back to SQL Server Management Studio.
4. Repeat step 2 – try to connect with the user’s credentials
Let’s try connecting again to check if the error message has changed.
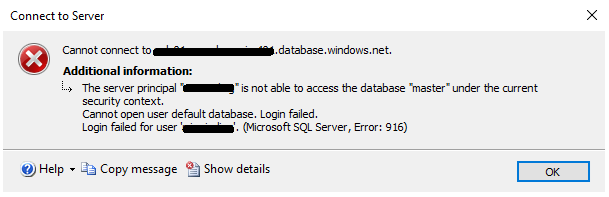
The message “no such host known” does not appear anymore! In my case the error says that the user does not have access to the master database which is its default database. In our case it’s not a problem, since the Linked Server is configured to connect to a particular database. Step 5 is optional – if you don’t have time to satisfy your curiosity, go directly to step 6.
5. Connect to a non-default database
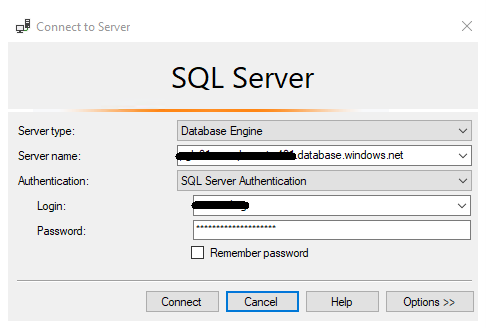
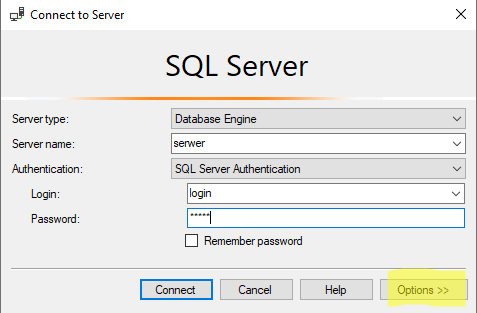
Choose the SQL Server Authentication option, enter the server name and user credentials and do not click automatically Connect but click Options >> in the right bottom corner.
Next change the database name from <default> to the one you want to connect to.

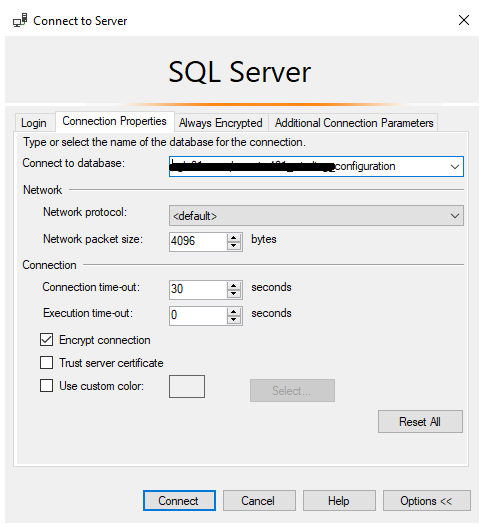
After clicking Connect we’ve been successfully logged on the source server:
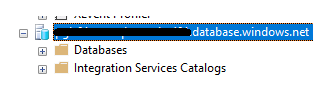
Then we can get back to the Linked Server creation.
6. Create the Linked Server
Finally, let’s re-enter the parameters the customer provided us with and try to create the Linked Server again. In my case no error message appeared and the Linked Server object has been successfully created.
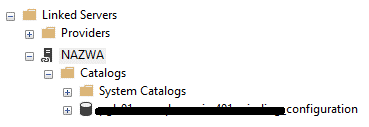
Right-click on the newly created Linked Server and choose Test Connection.
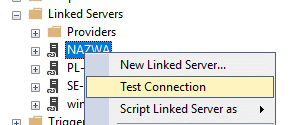
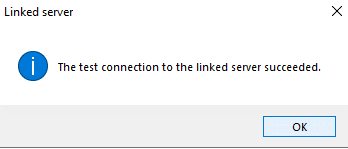
The reply we get is that the test connection was successful. The job is done!
The reason we failed to create the Linked Server immediately with the information provided by the requestor was not due to insufficient data from the client nor incorrect credentials. What we missed was asking ourselves (or the client) – where is the source server located. As it was not in our corporate domain, it was our duty to help our local machine connect to an external source by adding a row in the hosts file.
Any questions on how to configure a Linked Server? Are you wondering how such solution may boost your business?
Schedule a free consultation. Consult your company needs with our experts. Learn about solutions that will help your company improve business processes and ensure data security.